 Custom
Backless vs Illusion Back Gown: Fit, Support, Cost
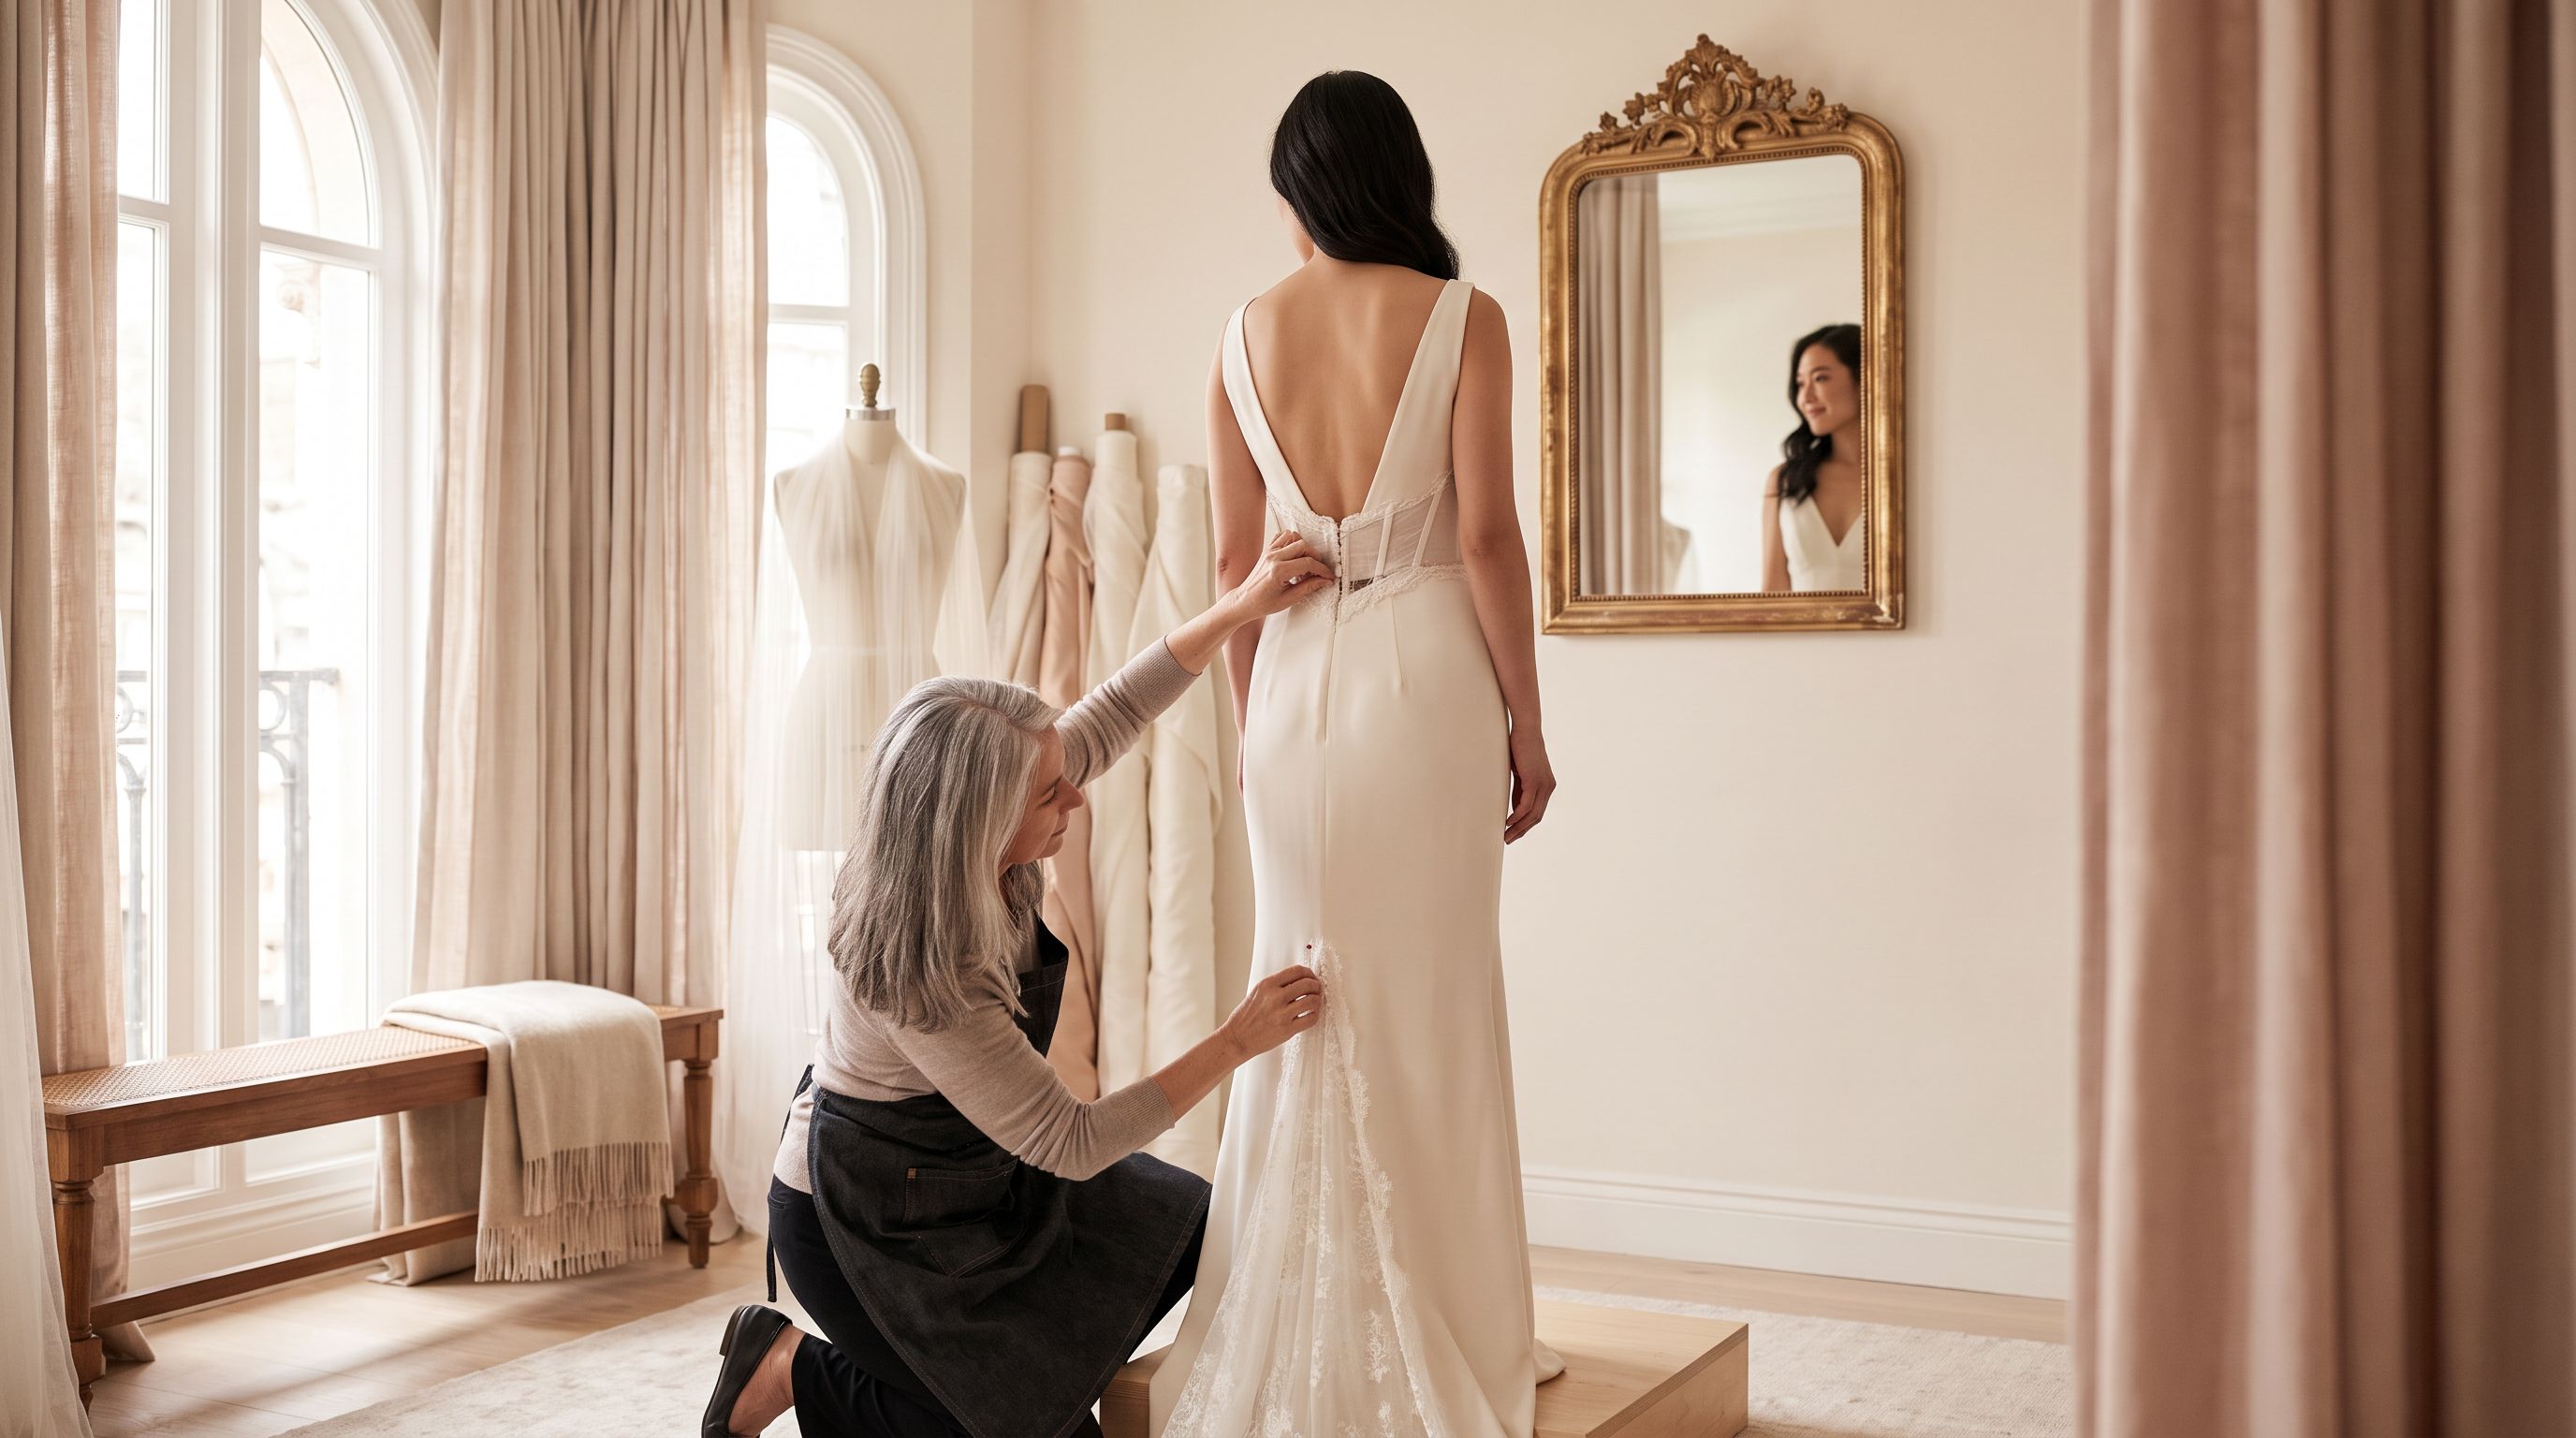
Almost everyone who falls for a low back asks the same two questions in the same breath: is it going to stay up, and can I wear a bra with it? Both are fair. A bare back is one of the most photographed details of a wedding gown and one of the easiest to get wrong off the rack, because the thing that makes it work is entirely invisible.
This is also one of the clearest arguments for going made-to-measure. A low back has to be mapped to your actual body — where your shoulder blades sit, how deep your lumbar curve is, where your bra band currently lands — and none of that is in a size chart.
Open back, low V, or illusion: what you’re actually choosing
There’s a third option people forget: a deep V back that stops at the natural waist, with a visible or hidden closure right at the point of the V. It gives you most of the drama with a fraction of the risk, because the gown still has a continuous waistline to grip.
It’s also worth saying plainly that plenty of ceremonies — religious, cultural, or family — call for a covered back, even when the reception doesn’t. That’s a design brief, not a compromise. A detachable illusion overlay, a matched bolero or jacket, or a convertible back panel that unhooks after the ceremony all solve it cleanly, and they’re far easier to build in from the first sketch than to retrofit at fitting three.
How low can the back of your dress actually go?
The honest answer is: as low as your support can be anchored, and not a centimetre lower. A fitted gown needs a circle of fabric somewhere that genuinely holds — usually at the natural waist. Once the opening drops below that anchoring point, the bodice is relying on friction, tape, and the weight of the skirt.
Forget cup letters on their own here. A 32DD and a 42DD are completely different engineering problems. What a maker actually measures is the difference between your full bust and your underbust, plus how much weight needs supporting — cup letter relative to your band, never the letter alone.
- Small bust-to-underbust difference, light skirt: the back can usually drop to the small of the back, around or just below the natural waist, with a well-fitted internal foundation.
- Moderate difference (roughly four to six inches): plan to anchor at the natural waist. Going lower generally means a structured corselette, strap tension from the front, and body tape at the edges.
- Large difference, or significant bust weight on a narrow band: a true bare back to the lumbar curve is possible but demanding. An illusion panel, wider straps, a deep V stopping at the waist, or a corseted front with a hidden back stay will all serve you better — and you’ll be able to dance. Our guide to designing a gown for a full bust and small waist goes deeper on the bodice engineering.
- Long torso: your natural waist sits lower than a pattern assumes, so a back that looks moderate on a sample may read dramatically low on you. Good news — that’s a free win.
A few situations a thoughtful dressmaker should raise before you do. If you wear a breast prosthesis, internal pocketed cups can be built into the foundation so nothing depends on a bra you can’t wear — and the panel or opening can be positioned to sit where you want it relative to surgical scarring, higher or lower, symmetrical or not. Broader or athletic shoulders usually want the back opening narrowed at the top edge rather than widened, so the edges sit on the shoulder blades instead of sliding toward the arms. And if you use a wheelchair or will be seated for most of the day, the whole brief changes: seated-fit patterning, a closure you can reach or that a helper can manage quickly, no boning that lands where your body meets the backrest, and a skirt that doesn’t pool in the wheels.
What actually holds a backless gown up
Inside a well-made low-back bodice, you should see some combination of:
- A separate internal corselette or foundation layer — a mini-corset stitched inside the gown, with its own closure, doing the real lifting.
- Shaped cups or a built-in bra, molded or hand-draped to the wearer’s bust, stitched to that foundation rather than to the fashion fabric.
- Boning channels through the front and side seams, with spiral steel at the curved seams (it flexes with you) and sometimes lighter plastic elsewhere.
- A waist stay — a grosgrain ribbon that fastens around your natural waist before the gown closes. It is the single most important component in a backless dress, transferring the skirt’s weight to the waist so the bodice isn’t hanging from the bust.
- Grip at the top edge: silicone elastic, lingerie elastic, or tape-ready edges.
If a maker can’t tell you where the waist stay goes, they aren’t building a backless gown — they’re hoping.
Where does the closure go when there’s no back?
This quietly shapes the whole design. With an illusion panel, a fine invisible zipper or a row of covered buttons runs up the tulle and vanishes. With a true open back, the closure has to move: a side zip, a zip running up the lower back and stopping at the point of the V, or a corseted front. Each has a silhouette consequence — side zips can interrupt a bias-cut seam, and corset lacing changes how much the back opening shifts on you. Our guide to corset back vs zipper vs buttons covers the trade-offs. Raise it at your first consultation, not at fitting two.
What the support work adds to your budget
A low back rarely changes the headline price by itself — but the construction behind it does, because it’s labor, and labor is the biggest cost driver in any custom gown.
The drivers: how much internal structure the bust needs, whether lace has to be cut apart and re-placed around the opening (slow, skilled handwork), the fabric — a bias silk crepe back is far trickier to stabilize than a structured mikado — and your maker’s experience.
There’s a real low-cost ladder here too. Converting a closed-back gown you already own into a deep V or illusion back is usually the cheapest route of all. Choosing a deep V with an attractive visible closure — buttons, a tie, a decorative hook-and-bar — instead of a fully built internal corselette saves hours of hidden labor. And a plain, well-matched tulle panel costs a fraction of beaded lace while doing the same structural job. Ask whether support construction is included in the quote or billed separately; a good maker answers without flinching.
The five movements to test at your fitting
-
Raise both arms overhead
The front should not ride up and the top edge should not pull away from your chest. If it does, the foundation isn’t anchored at the waist. -
Sit down and stay there
Low backs bite when you sit. Check for boning digging in at the hip and for the opening gaping as your lumbar curve changes. -
Hug someone
Arms forward, shoulders rounded. This is where a too-wide back opening collapses inward and shows the edge of a cup. -
Lean forward from the waist
Toasts, cake, kissing a grandparent. You should not be able to see down the front. -
Walk away from the mirror and look back
Check the opening against your bra line in a photo taken from eight feet away — the exact distance your guests will see it from.
What to ask before you commit
- “Can I see the inside of a low-back gown you’ve made?”
- “Where will the waist stay sit, and where does the closure go?”
- “What support can you build for my bust without a visible bra?”
- “How low can you take this back on my body, and what’s the trade-off if we go lower?”
- “Is the internal foundation included in the quote?”
Listen to how those questions get answered. A maker who’s genuinely comfortable building low backs will start talking about your measurements, your posture, and where your waist actually sits — not reaching for more inspiration photos. That’s the signal, and it’s the one worth hiring on.
Ready to bring your dream dress to life?
Tell us what you're picturing — style, timeline, and budget — and we'll connect you with custom dressmakers who can make it. Free, no obligation.
Get matched with a dressmakerRelated guides
Getting a Wedding Dress Made Abroad: Is It Worth It?
Thinking of having your wedding dress tailored in Bangkok, Hoi An or Bali? Real costs, timelines, risks and how it compares to a custom dressmaker at home.
Read guide →
Bought a Wedding Dress Online? Alter, Remake, or Custom
Your online wedding dress arrived and the fit is wrong. Here's how to tell what's fixable, what alterations cost, and when going custom is the smarter buy.
Read guide →
Custom Veil vs Heirloom Veil: Cost, Length, and Fit
What a custom wedding veil costs, how to choose a length, and when wearing (or restoring) an heirloom veil is the smarter, more meaningful choice.
Read guide →